
Allow Downloads from Anywhere
Author’s note: This lesson has been updated and re-recorded for Windows 11 version 22H2 (April 2023). If you are unable to follow the instructions in this lesson there could be a couple of reasons. See Footnote 1 below for additional information.
Lesson 2
Resources
ZIP file of all resources for lesson 2 (alternatively, download individual files below)
Vocabulary list (lessons 1 – 3)
Windows 11 Orientation Snack Game (lessons 1 – 3)
Back to Windows 11 Training Page
Objective
By the end of this lesson you will understand, be able to discuss, and/or perform the following task as it relates to making a change to the default settings in Windows 11:
- Change permissions to allow downloads from anywhere, instead of just the Microsoft Store
NOTE: Please check with your IT administrator if you work in a secure environment before making any changes to your PC.
When you attempt to install an app that is not listed in the Microsoft Store the install may be blocked on your computer for Windows security reasons. If this happens you may encounter a dialog box that reads “The app you’re trying to install isn’t a Microsoft-verified app.”
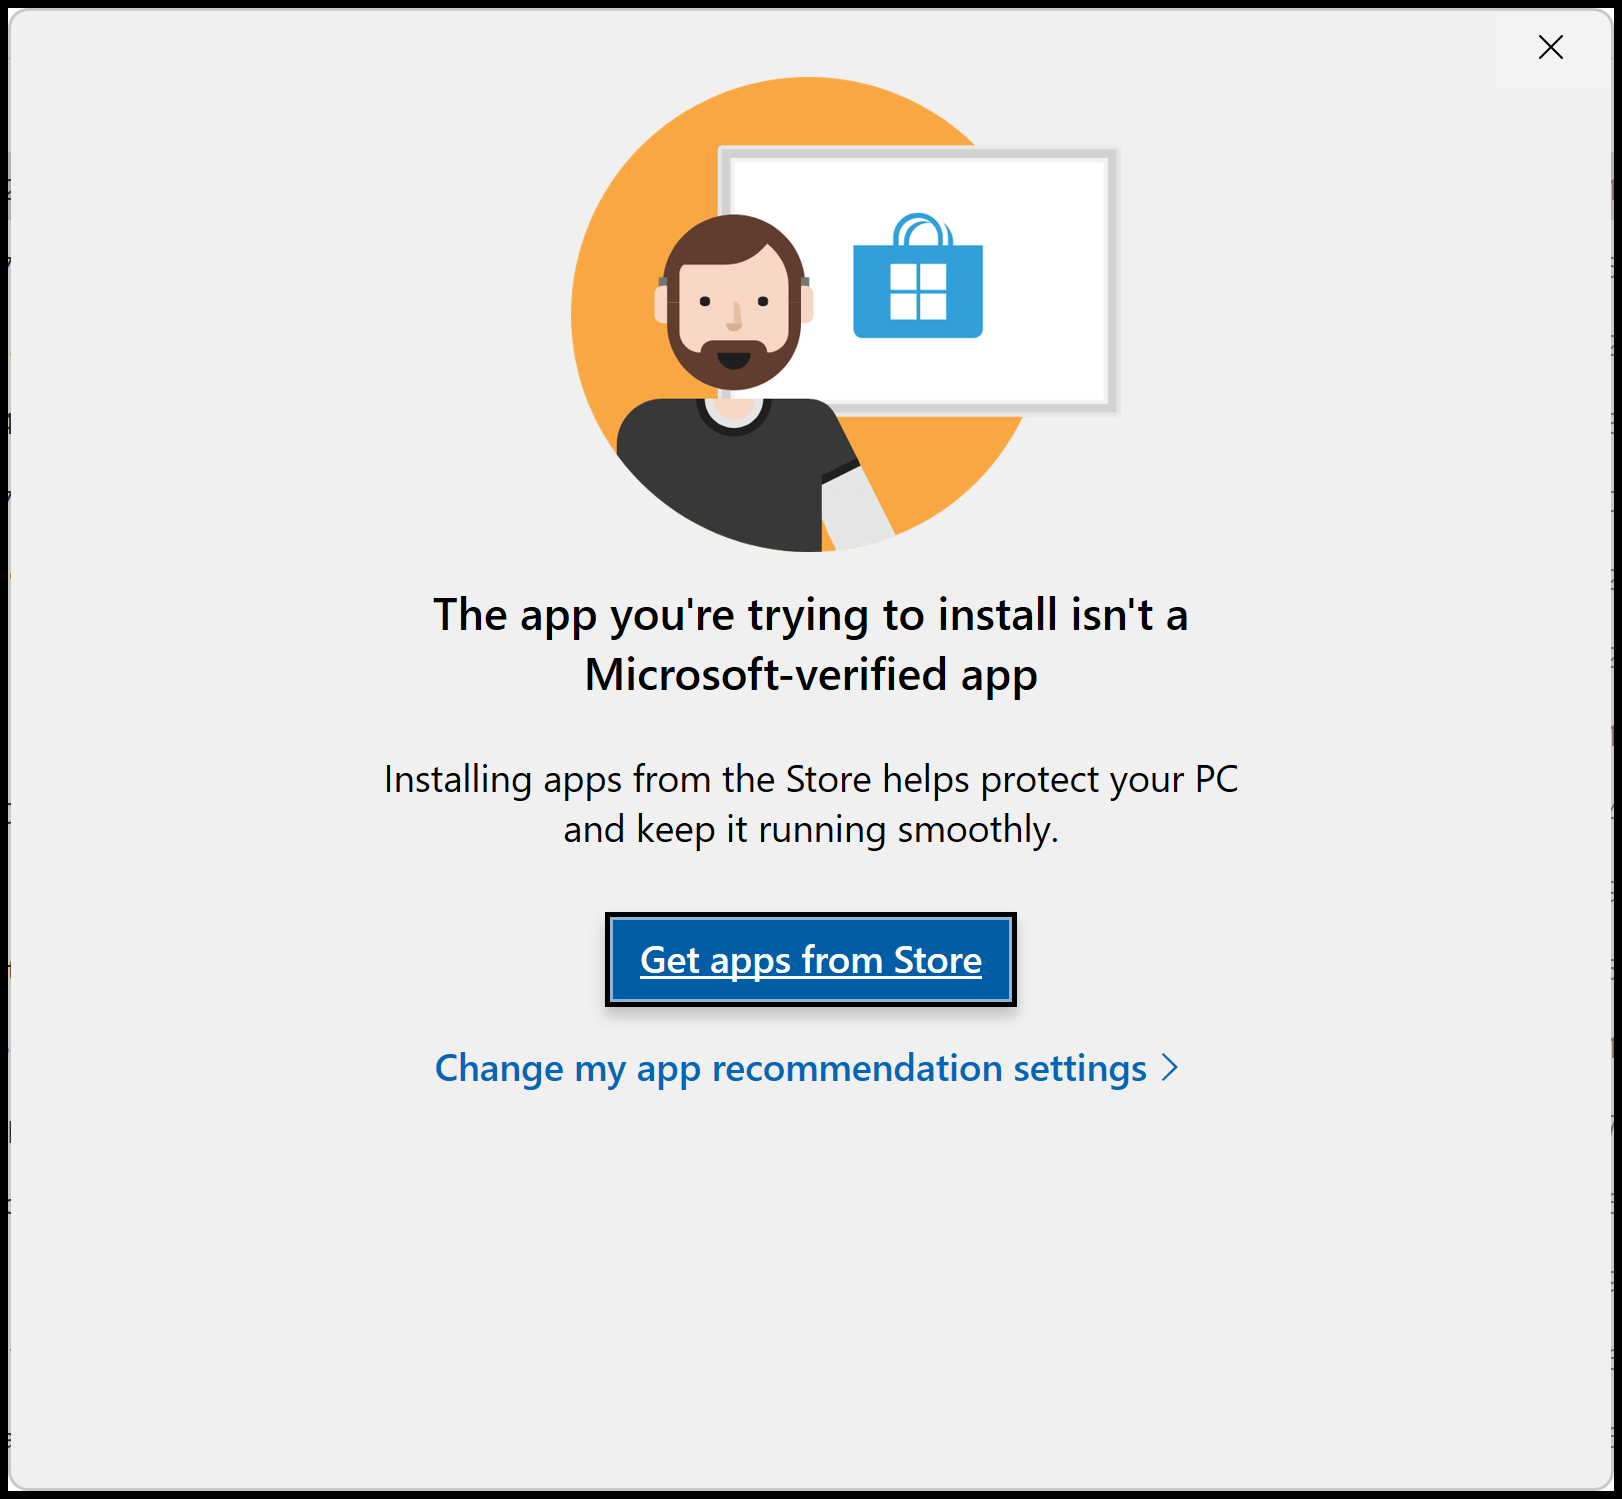
There are two choices in this dialog box:
- Get apps from Store (button, default)
- Change my app recommendation settings (link)
To change this, do the following:
- If you have received the security message above and focus is within the dialog box to get apps from the store or change app settings, choose the link “Change my app recommendation settings.” If you are not at this spot you may start from the beginning with the next step.
- I currently have JAWS running on my PC and the security message from Windows is NOT open on my computer. Open Settings by pressing WINDOWS key+I. Windows 11 Settings opens to the System tab with focus in the search edit box.
- Move to “Apps” in the categories list on the left side of the screen by pressing DOWN ARROW several times.
- Press ENTER. The right side of the screen changes to show settings for Apps.
- Move to “installed apps” in the list of Apps settings on the right side of the screen by pressing TAB.
- Next, move to “Advanced app settings” in the list by pressing DOWN ARROW, and then press SPACEBAR to expand it. Focus is in the “Choose where to get apps” combo box.
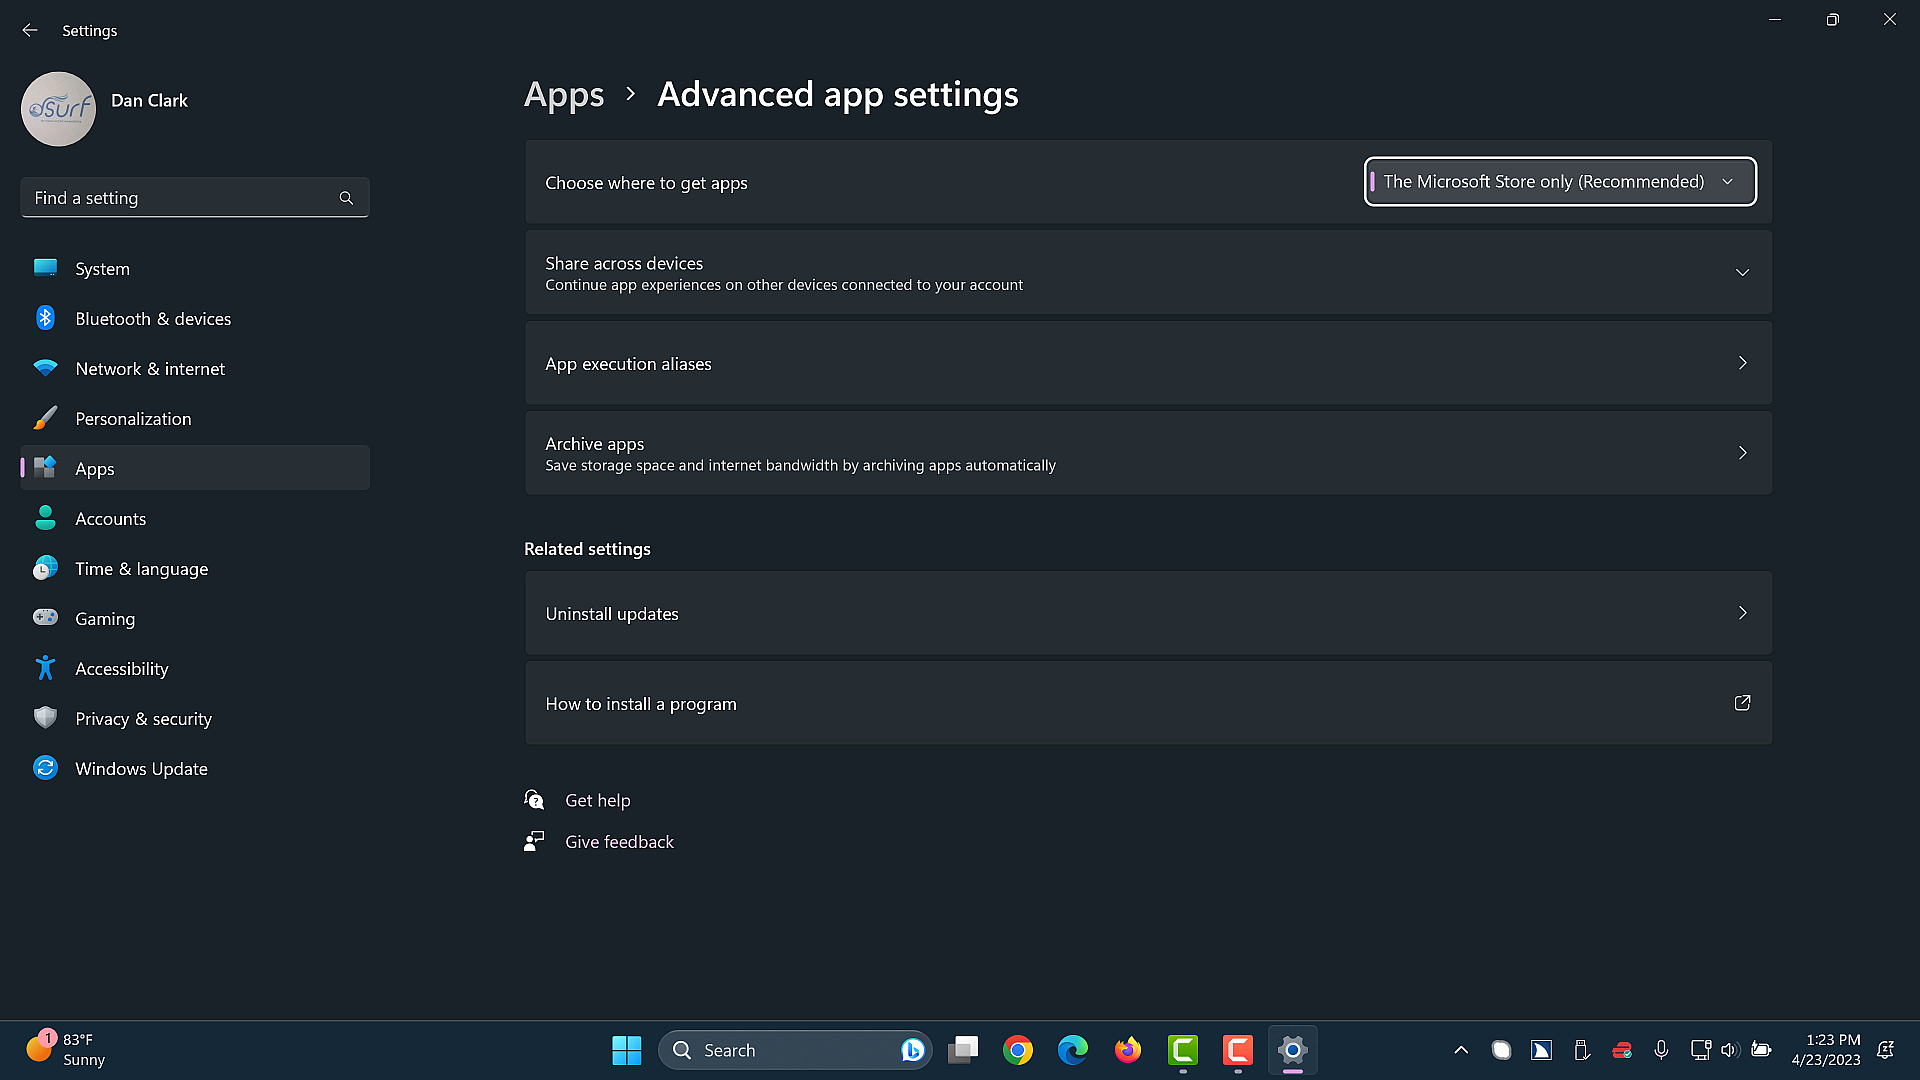
- Press ALT+DOWN ARROW to open the list.
The following choices are available:
- Anywhere
- Anywhere, but let me know if there’s a comparable app in the Microsoft Store
- Anywhere, but warn me before installing an app that’s not from the Microsoft Store, or the fourth choice,
- The Microsoft Store only, which is the recommended choice.
- Choose one of the first three options to suit your preferences. This allows you to install apps of your choice, but with or without a warning message from Windows, depending on your selection. I will choose “Anywhere.”
- Press ENTER.
- When you have made your choice, press ALT+F4 to close Windows Settings. The changes are saved automatically.
Footnote 1 – If you are unable to follow the instructions in this lesson there could be a couple of reasons:
- First, you must have administrative rights to install apps into Windows 11.
- Also, it may be possible that your computer was set up in S Mode (safe or sandbox mode) by the manufacturer of your PC. You can read about S Mode in an article from Microsoft here: Switching out of S mode in Windows 11.
Thank you for joining me in this lesson on making some initial changes to the Windows 11 default settings. In the next lesson we cover the Taskbar and System Tray corner.